SELLER CONSOLE AND PRICING
TOPICS DISCUSSED
The Seller console is web-based and can be reached by clicking this link - https://admin.parkwhiz.com/login
SIGN IN
Enter credentials to access the Seller account.

DASHBOARD
The Seller Console opens to a Dashboard. All locations the user has access to are listed on the left.
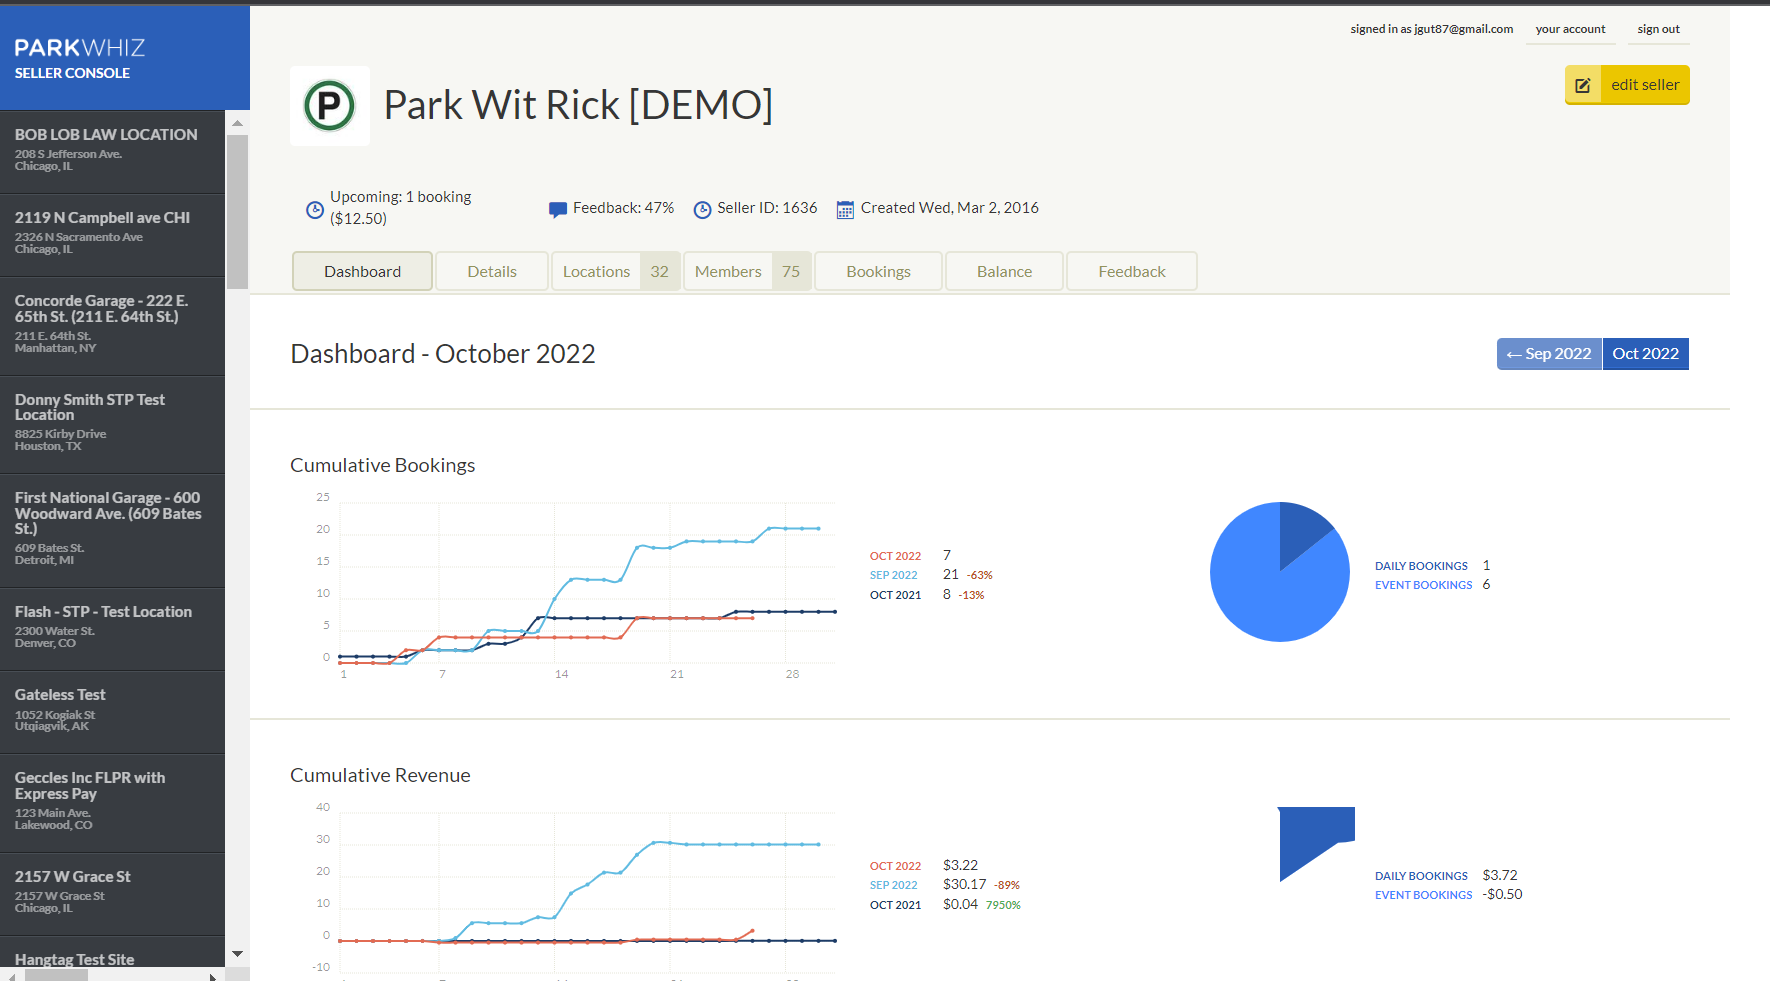
The Dashboard contains cumulative booking and revenue data as well as a breakdown by location further down the page.

The menu across the tops allows for quick access to the following:

The menu across the tops allows for quick access to the following:
- Dashboard - Revenue information at a glance
- Details - Payment Info for the location
- Locations - List of all locations within the Seller Account
- Members - Users with access to the Seller Account Admin site
- Bookings - Parking payments
- Balance - Location accounting data
- Feedback - Customer feedback left by the parker
LOCATIONS
All of the ScanToPay locations for the Seller Account are listed here. Double-click on a location to view more detail.

BOOKINGS
Payments made to the specific locations appear here and can be filtered by date and type of parking.

PRICING
Pricing can now be created by location managers under the On Demand tab.
Access this tab by doing the following:
- Search for the location to be updated
- Select the Pricings tab
- More tabs display on the pricing page, the page defaults to the Reservation pricing
- Select the On Demand tab

Add Default Pricing

Default pricing may be added if there is a rate that is available 24/7. This pricing is optional
- Select the add default pricing button
- Enter the Pricing name
- Enter the hours and price for that amount of time
- Select add a row to enter additional price points
The amenities should be selected by default but confirm the following are checked.
- Guaranteed to be unobstructed while the vehicle is parked
- Accepts smartphone mobile parking passes

Add New Pricing
Pricing that varies in days/times can be added in this section. Default pricing can also live here, it does not need to be entered in the Default Pricing section.

- Select the add new pricing button to add all other pricing
- Enter a pricing name
- Select the valid days and times
- Enter the hours and price for that amount of time
- Select add a row to enter additional price points
The amenities should be selected by default but confirm the following are checked.
- Guaranteed to be unobstructed while the vehicle is parked
- Accepts smartphone mobile parking passes

Pricing Blackout Dates

Managing Event Pricing for Scan to Pay
Adding New Events
Any new events should be communicated to the Sellers Support team (sellers@parkwhiz.com). Rates should be sent in 24 hours in advance to give the team enough time to fulfill the request. If more than 10 locations, more time would be recommended.
Include the Location number, Rate of the Event, Event Start Time, Event pricing end time, and Out by time.
- This Rate has local taxes included – does not include additional fees.
- Event Start Time is when the Event Rate starts, and the regular rates are paused.
- Event Pricing end time should be when regular prices go back in effect and the Event Rate will end.
- The event out by time is when the vehicle needs to be out of the lot.
- If a location has multiple zones, specify which zone(s) the event rate applies to.
- Multiple zones are needed only if the pricing is different for each zone. (e.g. short term vs. long term have a different pricing structure).
Updating Existing Events
An existing event can be managed in the ParkWhiz Seller Console (https://admin.parkwhiz.com/).
- Log into the Seller Console.
- Scroll down on your main dashboard to the list of Locations. Find the Location with the event and click it to manage the location.
- Once in your location, click on Pricings to view all pricing at the Location.
- Click on the active (is not paused) price for the event. It will be labeled with the word “EVENT”.
- Modify the Start Day, Start/End Time, Hours, or Price of the event. Then scroll down to the bottom and click the “save changes” button.
- If the Date or Start/End time is modified, you will also need to adjust the Blackout Dates for not only the event, but all other valid pricings at this Location as well. A Blackout will need to be set on ALL active pricing during the event – see below.


Adjust the Event Blackout
The From Date/Time on the Blackout will be the same as the end time of your event. And the To Date/Time will be set way out in the future. Essentially, you want the event pricing to be blacked out once the event ends.

Adjust the Non-Event Blackout
The From Date/Time on the Blackout will be the same as the start time of your event. And the To Date/Time will be set to the end time of your event. Essentially, you want the “normal” pricing to be blacked out (not available) while the event pricing is available.

*NOTE*
If there is more than one event, then multiple Blackout Dates will need to be set on the non-event rates, one for each event, like so:
Event Pricing
Event pricing is also available under the On Demand tab by clicking the Event tab.

- Click new event pricing
- Select the venue of the event from the drop-down menu
- Click find events.

- Select 1 or several events to add pricing to at once.

- Scroll to the bottom of the page to click the create pricing for selected events button

- Enter the price of each event
- The Arrival field defines the number of hours before the event starts that event parking will be available
- The Departure field defines the number of hours after the event ends that event parking will be available

- If all selected events will have the same parameters, do the following:
- Set the parameters for the first event
- Click the Match all to first
- Additional amenities may be noted below
- Scroll to the bottom to save changes.
Was this article helpful?
That’s Great!
Thank you for your feedback
Sorry! We couldn't be helpful
Thank you for your feedback
Feedback sent
We appreciate your effort and will try to fix the article